Slowly I start… step by step. The title leads you to believe this is going to be quick and simple. NOT!
My Christmas Story begins in a garage that is over stocked and in need of Purging and Re-Organizing. But that will be another story….
Let’s start with getting the mantle decorated. It is a work in progress and I am asking you to come along.
My mantle isn’t quite finished, but I’m really liking the way it is already looking.!
I didn’t know if I would post a picture but I am so excited I just had to.
It was really getting me into the Spirit.
Once I started it was beginning to have a classic Christmas look. I like it.
To start with there are quite a few varieties of garland you can use. If you are using real – eucalyptus, pine and cedar are some of my favorites – and you can go with real or faux greenery. Faux garland will last much longer and it is easier to manipulate, shape, and embellish with accessories.
Ok.. this is totally an “in progress” picture. Seriously doesn’t this greenery look SO real!? I could not be more impressed with it.
I started out wanting to maybe change this up but mostly everything online is Sold Out and it is “slim pickings” in the stores.
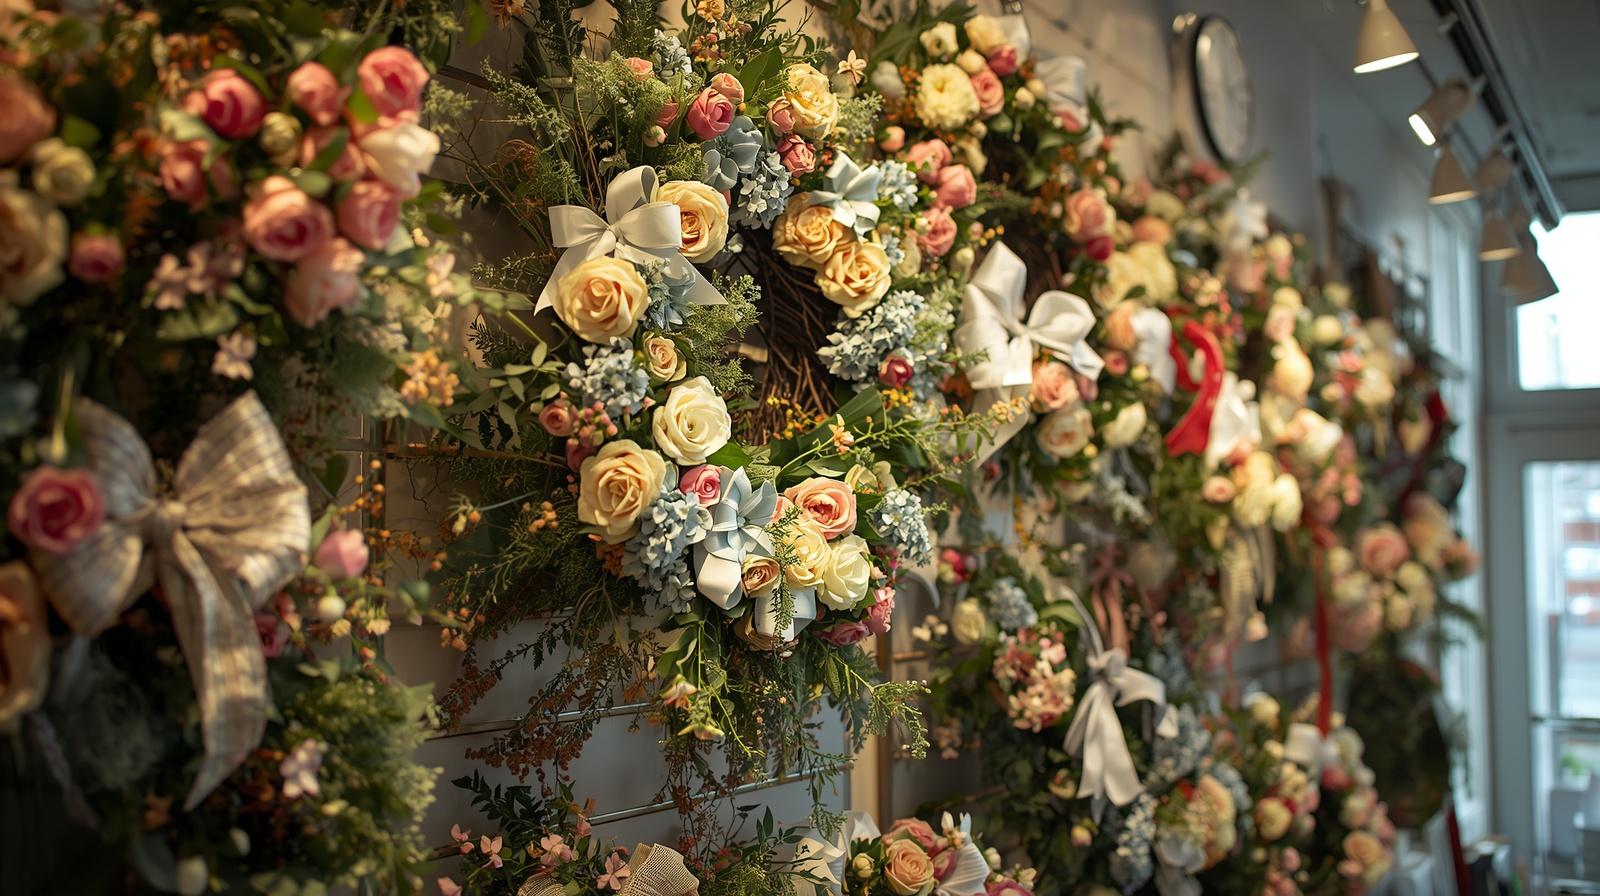
Below are some beautiful garland options that I love! They are from Decorators Warehouse.
You’ll need to choose where you’re placing your garland. You have three options:
Options 2 and 3 are similar in terms of how you secure the garland to the mantle. This isn’t a difficult task. You just need to ensure you have the right materials and tools.
To do this project, you’ll need just a few simple tools and supplies:
First step is be sure to clean your mantel. Just wipe it down with a clean slightly damp rag. Now gather all of the garlands and accessories you’ll be using to decorate your mantel. Group all your like items together. If your like me, you saved a bunch of pics on Pinterest with great looking mantles. Keep those handy to help guide the look. You are trying to achieve. attach the items to the garland to ensure you don’t miss a step or have to redo things.
Be sure clean your mantle. Just wipe it down with a clean slightly damp rag.
I use 3M Command hooks for everything, if possible. Good for hanging the garland. No Damage.
“For best adhesion be sure to clean the surface with “rubbing alcohol.”
Important: Be sure to use the Right Size hook.
My garland was very light, I was able to use the mini clear hooks. You’ll want to affix the Command hooks to a horizontal surface (the top of the mantel), attach one adhesive strip to the hook.
Quick Tips:
With your garland in the correct place and at the correct length, now you can secure the garland to the hooks. You can do this in one of two ways: you can tuck a branch of the garland into the “u” of the hook, ensuring it fits snugly. Or, if you want to make things more secure, wrap one end of floral wire around the garland and then wrap the other end a few times around the hook.
It will help if you lay the Garland on top of mantle and eyeball what looks good to you.
My garland was only 5′ and I knew I wanted to go at least a foot down each side so this meant I needed to use two garlands.
If you are using different types Garland and want to combine to achieve your look you will want to gather them together with floral wire.
Using multiple Garland – wire them together using your floral wire. A good gauge is the 22 gauge floral wire. Place the garlands end to end with a slight overlap.
Step 1 | Straighten out any bends in the garland.
Step 2 | Ensure that the spine is facing downward.
Step 3 | Work your way from one end of the garland to the other.
Step 4 | Shape each tip in the same direction and lift them to create layers of foliage.
Step 5 | After shaping, stand back and check your work. Adjust any stray tips.
Step 6 | For decorated garlands, adjust the tips to make sure the accents are visible.
Now that you know how to shape your wreaths and garlands, it’s time to plan where to place them, then start decorating. See more tips on how to hang your front door wreath and other greenery HERE.
Balsam Hill
Spread out your accents, randomly is best…. Go by what you want to see and what makes you smile. This is not the time for perfection. You want it to look natural, like in Nature.
I am more a simple design….but I love this one from Decorators Warehouse.
You can add additional branches and sprays to give your garland dimension and texture. Tuck in the branches and secure them using floral wire.
Extras: Birds, Candles, Bells, Reindeer (use your imagination).
I love the look of ornaments on your garland, this is when they should be added as well. Adding ornament clusters, be sure to wire the ornaments together first.
”Use odd number of grouping, like in all design.”
I wanted to share a picture of a garland on a mantel that I am so in love with from decorating warehouse.
And that’s it, your garland is complete. I is you are ready to get Decorating. You Got This!
Thanks again for being a part of the City Cottage family.
Be sure to follow and share us on Facebook, Pinterest, Twitter and Instagram.
Sharing is Caring.
This site uses Akismet to reduce spam. Learn how your comment data is processed.


Absolutely beautiful. A must try. Thanks for sharing.
Thank you so much. Thanks for visiting. Merry Christmas.????