Starting a Makeover can sometimes be pretty scary. If that is the case for you, then this post will definitely help you…
I hope you’re all doing well — and maybe, just maybe, starting to feel a little anxious for spring-like weather. I know I sure am. 🌷 There’s something about this time of year that makes us want to refresh, reset, and breathe a little easier at home.
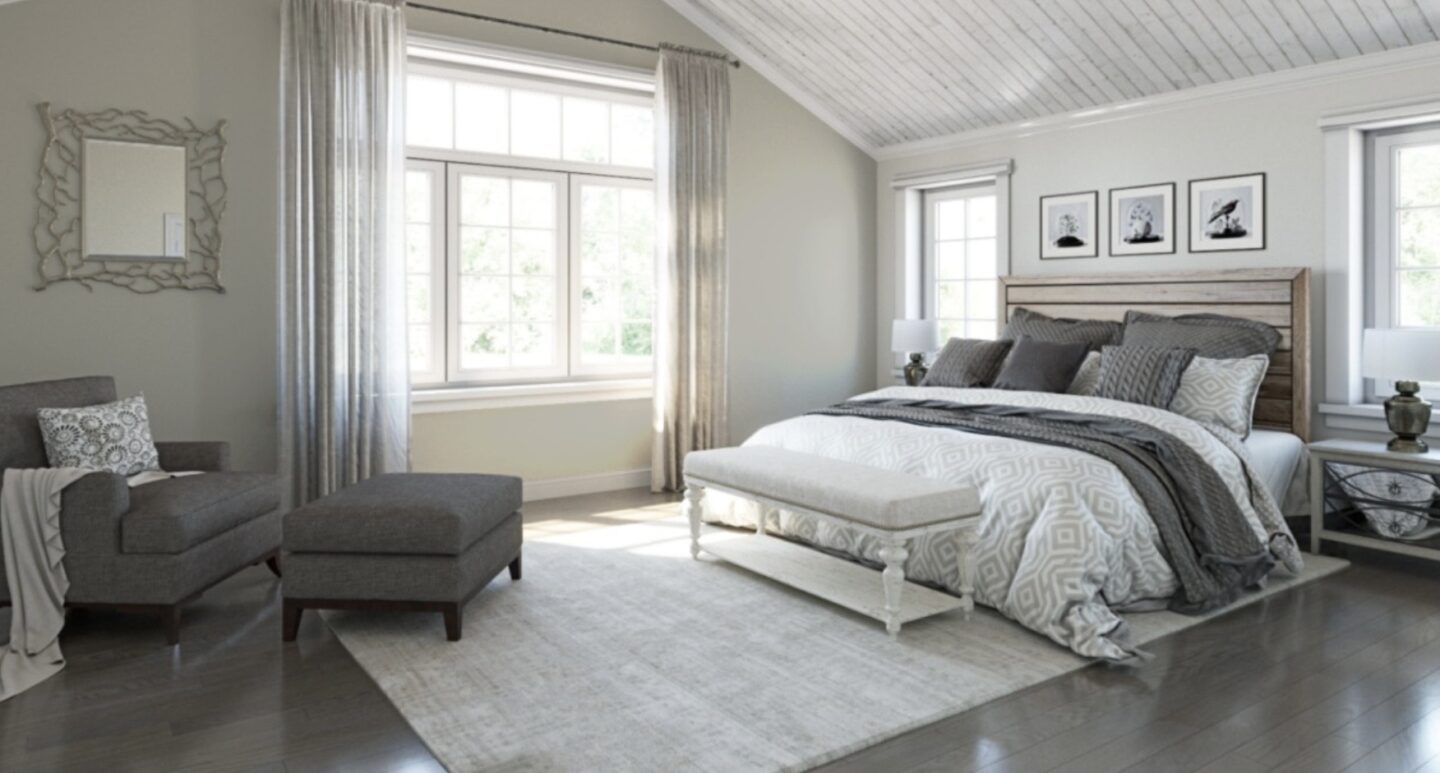
Lately, that feeling has hit me squarely in the bedroom.
I’ve decided it’s time to change the style of my master bedroom from Shabby Chic to French Farmhouse — my new favorite look. It feels softer, more timeless, and honestly, more me right now. I thought it might be helpful (and fun!) to share the exact process I use whenever I update or redecorate a room. Nothing complicated. Nothing overwhelming. Just a realistic, step-by-step approach that works. So here are my Must Know Tips for Updating My Bedroom.
Once I have my lists, I move on to the budget.
Here’s my advice: list every single item you think you need or want, then take a breath and be realistic. We all love the newest shiny things… right up until we see the price tag. Sticker shock gets me every time.
Having everything written down helps you decide what’s important and what can wait. It also keeps impulse purchases in check — especially when Pinterest starts whispering sweet nothings in your ear. 😉
overwhelming. My biggest tip here is to look for rooms that are similar to yours.
Pay attention to:
It’s easy to fall in love with a gorgeous bedroom that looks nothing like yours — and then feel frustrated when yours doesn’t magically transform the same way.
Another money-saving tip I swear by: shop your house. Move things from one room to another. Repurpose decor. Think outside the box. Something meant for the kitchen might work beautifully in a bedroom — and vice versa. Yes, you absolutely can do that.
When you’ve narrowed down your ideas, created a mood board, and identified the items you already own, you’re ready to begin.
But before clicking “buy,” let’s revisit the budget — one more time.
Pinterest can make everything look easy and expensive. Do you remember the old HGTV show High & Low Project with Sabrina Soto? The whole idea was finding beautiful alternatives for far less.
That’s your role here….
Unless your budget allows for an interior designer, you are Sabrina. Dream rooms really can come together — it just takes intention and patience.
I admire DIY bloggers endlessly. Truly. Their talent amazes me. Here are some of my favorite DIY Bloggers and believe me they will soon be yours:
Leslie@ My 100 Year Old House
Karianne @ Thistlewood Farms
Carol @ Bluesky At Home
Like I said there are so many wonderful DIY Bloggers, don’t be afraid to share yours in the comments below….
That said, I’ve learned something important about myself over the years: I know enough to know when I don’t know enough. And that’s okay.
If a project excites you and feels doable — try it. If it fills you with dread or stress, give yourself permission to buy instead. Save yourself the angst and disappointment and always circle back to your budget when making that call.
Let’s be honest — the hardest part of redecorating is the waiting.
These days, most of us rely heavily on online shopping. Once you’re confident in your layout, colors, and overall feel, it’s best to order as soon as possible. Shipping takes time, and planning ahead helps everything fall into place more smoothly.
I’ve recently ordered furniture from Wayfair and was very pleased with both the process and the delivery timeline (about two weeks). That actually worked out perfectly, because it gave me time to clear out the room — and trust me, purging does the soul good.
If possible, empty the room completely. If not, at least designate areas for:
When everything is sorted and accessible, donating or selling becomes much easier — and less overwhelming.
Before any new items arrive, take care of painting and repairs.
Paint truly sets the tone for a room. For this update, these are the colors on my drawing board:
These shades work beautifully together and flow into the adjoining bathroom as well. They seem to be my “Go To Colors” Always! Choosing paint can feel daunting, especially when you’re thinking about future furniture, flooring, or window treatments.
My advice? Choose colors you’re comfortable with. Remember — you’ll be in this room 365 days a year. Make sure you truly love how it feels.
Alabaster
Repose Gray
Back Drop
Once the room is painted, curtains hung, and repairs finished, you’re left with a clean slate — the best place to start bringing everything together.
This is where the fun begins. Shopping your home or online either but make it a fun experience after all the work you did to get here.
Updating a room doesn’t have to be stressful or expensive. It’s about having a plan, honoring your budget, and creating a space that feels like home to you.
Thank you, as always, for being part of The City Cottage family. I truly love when we can visit together like this.
This post may contain affiliate links. That means I may earn a small commission at no extra cost to you. Thank you for supporting The City Cottage.
Enjoyed this post? Let’s stay connected!
📌 Follow me on Pinterest for daily home inspiration!
📷 Join me on Instagram for behind-the-scenes styling tips.
🛍 Shop my favorite home finds here.
📧 Subscribe to my newsletter for exclusive styling tips & freebies!
This post may contain affiliate links. This means I may earn a small commission at no extra cost to you when you make a purchase. Thank you for supporting The City Cottage!