Top

Laundry Room Transformation

I hope your Week is going well so far. Mine is, as usual, hectic. I  am trying to get out and enjoy some time on the patio relaxing. I am not doing a very good job of that… 

Everyone needs some thing for motivation, mine is sharing before and afters. I like to revisit what you start out with and then the final results, I am always amazed. This is not just for me, I like to seeing other peoples before and after’s. My goodness there are so much talent, ingenuity and resources out there on the net. It is almost overwhelming. But still FUN to view.  


Deluxury Closets

I also have been for too many years to even mention always gone to Better Homes and Gardens Magazine and it’s just so happens that I found this article that was very helpful in my transformation. 

Even if I already have plenty on my plate, I seem to add more to it, does that sound like you? LOL. 

From Drab to Fab... 🎶 Laundry Makes Me Happy🎶

My laundry room was on the small size, lacked organization and definitely lacked style!

I do want to say, the best part of the laundry room before and after, is that I have a built-in ironing board. I have always wanted one and I have to say I love it. There’s even a space for the iron to be hidden away. This came with the house so I didn’t even have to go buy one and have it installed. Yippee!!!

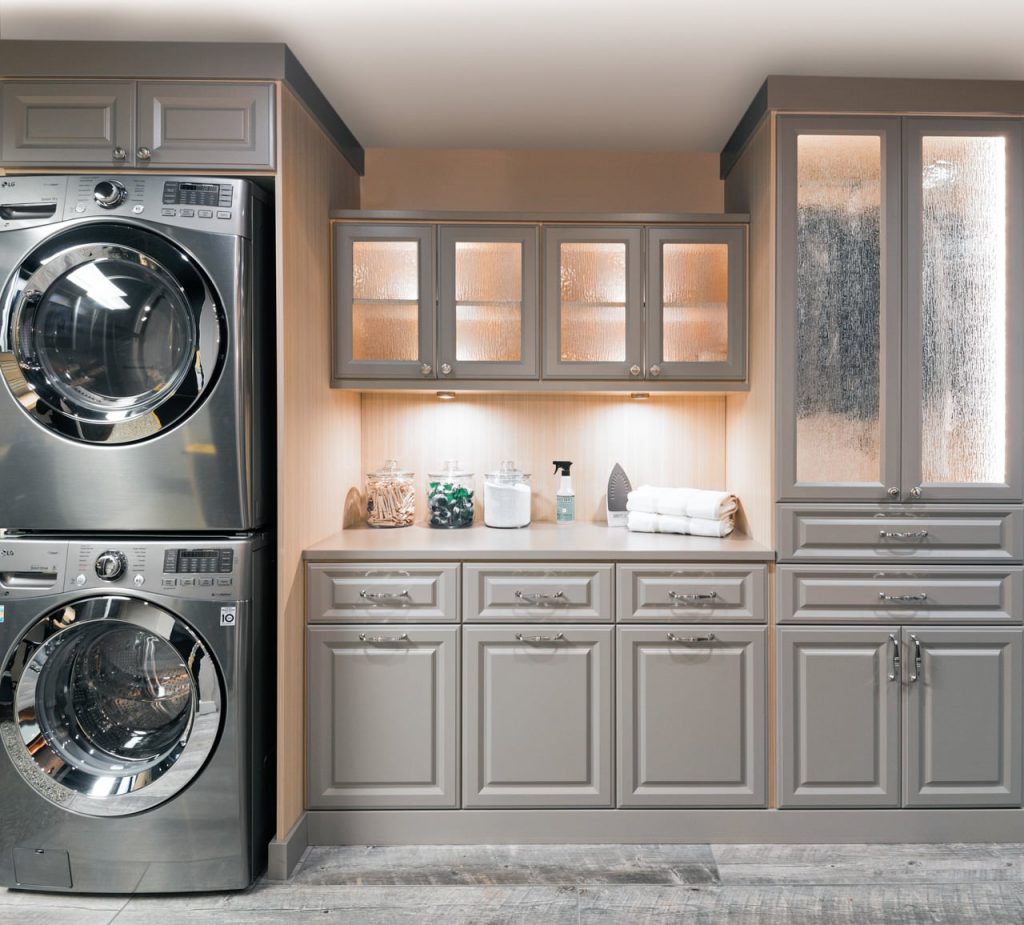
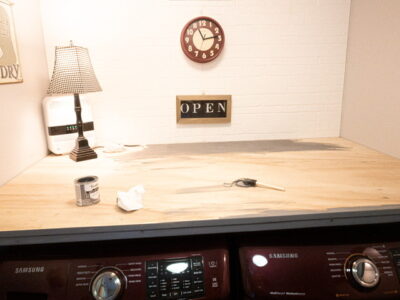
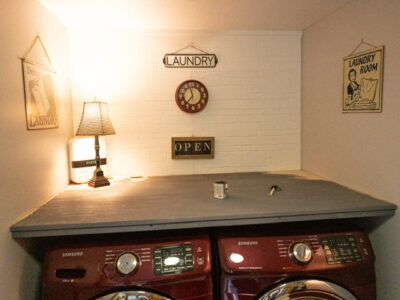
I have been hard at work, making this little room with no character into a charming and inviting space!
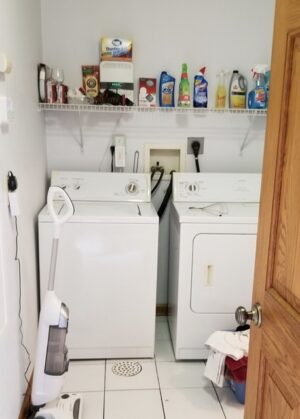
I wanted to give the room a little bit of character, so I decided to use Faux Brick Hardboard from Home Depot.  I had to watch several videos and thought that was a pretty neat idea.


The room only required (2) 4’x8’ sheets of Faux Brick Hardboard.
Preparation of the red brick to white wash was a little time consuming.  I chose to use white latex paint which I added water to and as I painted, I was wiping the excess off. I only did two coats of this Technique.  I would like to say I am not that creative to come up with that idea on my own. So like everything I do I go to the encyclopedia of information, Pinterest. LOL


Note
:  looking back on this project, with the hard board, I would consider also using white brick wallpaper removable. I don’t think it would be as time consuming or challenging. Just a thought!

Once the sheets were on the wall and the seams were filled with drywall compound and the excess was removed, I was ready for the countertop. 

Front Loading Washer/Dryer Controversy…..

Everyone’s taste with front loading machines are different, I know there are several schools of thought that these are not good pieces of equipment. This is my second set, I have never come into any problems. I really like their assorted functions and ease of using.

High/Low “Your Choice”

I chose to use pedestals for the machines, I have back problems and it’s difficult for me to bend over. So hence, that’s the reason the countertop is so high. You don’t have to do that, you can do the same countertop but at a lower level (not purchasing the pedestals). The principal for this project will still be the same. 
Ready to do the final update, the staining of the countertop.

Shelf Above Appliances

Materials Used

  • Varathane #269394 Wood Stain-32 oz – Weathered Gray
  • Varathane (Clear-Satin-Water-Based-Interior) Polyurethane
  • 2” Chip Brush
  • Foam Dabber Brush (for cracks)
  • (2) Sheets Kingston-Brick-Hardboard-Wall-Panel
  • Wood: 1/2” thick Smooth Birch Plywood

Directions

Using your chip brush and applying a medium saturation moving brush strokes with a left to right sweeping spreading the stain into the wood. 


While applying the stain evenly it will seem rather dark. Don’t be alarmed, it needs to seep into the wood.
I did not wipe it off I wanted a darker gunmetal with blue tinge. But you can always wipe it down to your liking.

NOTE: Drying time they say takes an hour but I gave it 2.5 hrs. Before returning the decor to the shelf.

Total Time for Project: 5 hrs.

I am very pleased with it, it is only taken me months to get to this point. Mainly, I am a procrastinator. 🤔

I hope this gives you encouragement to do the staining or painting and above all else updating your laundry room as well. “You Can Do This”!

Special Note: The most important thing is to have, patience. All paint, stain and polyurethane has to have time to completely absorb and dry.  


Organizing an Efficient Laundry Room

There are several things you can do to organize your laundry room and make it more efficient:

  1. Sort clothes by color and fabric type: Sort clothes into piles of whites, darks, and delicates before washing to avoid bleeding and shrinking.
  2. Utilize vertical space: Use shelves, hanging rods, or pegboards to store laundry detergent, dryer sheets, and other supplies.
  3. Use clear storage containers: Use clear storage containers to store your laundry detergents, fabric softeners and other supplies. This will allow you to see when you are running low and need to restock.
  4. Keep a hamper or sorting system nearby: Place a hamper or sorting system near the washing machine so you can easily sort clothes as they come out of the dryer.
  5. Use a folding table or counter: A folding table or counter provides a flat surface to fold clothes and also can be stowed away when not in use.
  6. Have a place for everything: Make sure you have designated spaces for everything in your laundry room, so you can easily put things away and keep the room clutter-free.
  7. Consider installing a drying rack: Drying rack can be handy for items that can not go in the dryer, or for air-drying delicates.

By implementing these tips, you can make your laundry room more efficient and save time on laundry day.

Final Touchups

Who doesn’t love to decorate, some of the Decor is a few years old and some is new and then there is the cute little dress hanging on the ironing board door.  

Laundry Sylvan

My creative and talented friend Ruth made that as a gift for me.  Don’t you just love it? 

Finished Room

Well, I guess we’ve talked enough about my laundry I’ve got to get busy and get to washing and drying clothes…. I always look forward to this because I get to admire the “pretty” room.  
If you have tackled your Laundry Room,  Laundry Area or Laundry Closet please feel free to share comments and photos, our readers always like  to see updates from other readers.  

Thanks for joining me and being a part of The City Cottage Family.

Until next time….


Please visit and share us on Instagram, Pinterest and Facebook. “Sharing is Caring” 


SUBSCRIBE HERE TO RECEIVE THE LATEST UPDATES

Please forward this email with a friend to share the love.

DON’T FORGET TO FOLLOW ALONG!

INSTAGRAM | PINTEREST | FACEBOOK | TIKTOK |

Disclosure: I only recommend products I would use my self and all opinions expressed here are my own. This post may contain affiliate links that at no additional cost to you I may earn a small commission. Read our full affiliate disclosure and privacy policy.

Comments

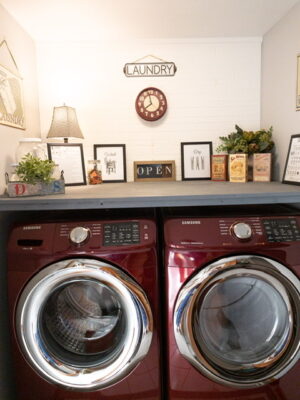
  1. I am loving your new laundry room!!! Not only do i like the style but I think having the shelf over the machines would be so useful. I will be making some alterations to my laundry room as well and this post was so very helpful!!!!!!!!

    • Hello Maria, thank you for visiting and the compliments. When you do your update/refresh, please post pictures. I always love to see what others can do. Be safe. Hope to see you again,
      Blessings, Patricia

Leave a Reply

Your email address will not be published. Required fields are marked *

This site uses Akismet to reduce spam. Learn how your comment data is processed.