Unscrew the base plate from the wall to remove the piece .
Install new thermostat base
Screw the plate to the wall, using a level to avoid crooked thermostat.
Connect the wiring
Install the batteries
Attach the new thermostat
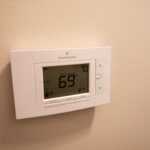
Restore the power and program the thermostat
Restore the power and program the thermostat
Test the thermostat
Notes
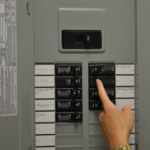
Important: this is a low voltage wiring installation project, but don’t hesitate to call a license electrician for help if you are uncomfortable working with the electrical components.
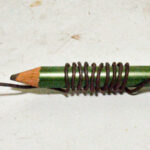
Detach the wires from the thermostat to remove the unit. At this point, you can use a circuit tester to verify no electricity remains in the wires. Note: before removing the wall plate, take a picture of where the wires are connected so you can use it as a reference when installing a new one. As you disconnect the wires from the wall plate, wrap them around a pencil or take them so they don’t slip back into the wall. Pro tip from Lowe’s: if you’re removing an older manual thermostat, it probably contains mercury and will require cautious hands and proper disposal.
Drill new holes if necessary to mount the new wall plate.
Feed the wires through the plate and keep them secured with a pencil or tape.
Follow the picture on the manufacturers instructions to connect the wires to their corresponding terminals on the thermostat. Follow the letter coding rather than the wire colors to match them properly. Secure them with the terminal screws.
Mount a new thermostat to the wall carefully fitting the connected wires into the wall.